


출발 전에 eSIM 구매 (1~5GB, 7일 기준 약 5~15유로) 후 QR 코드 수령 세포 휴대폰에서 탭하세요 eSIM 추가, 그리고 다운로드하려면 코드를 스캔하십시오. 착륙한 후에는 켜면 사용할 준비가 됩니다. 4G/5G.
설치 전 점검 목록
EID 확인
휴대폰 다이얼을 열고 입력하세요 *#06#. 당신이 보는 32자리 숫자는 지원하다. 이는 내장 장치 식별자이며, 하드웨어 수준의 고유 번호입니다. 세르비아로 여행하기 전에, 다음을 포함한 전체 코드가 있는지 확인하십시오. 89, 올바르게 표시됩니다.
이 코드는 GSMA SGP.22 준수 eUICC 칩은 휴대폰 메인보드에 납땜되어 있습니다. 해당 칩은 0.6 밀리미터 걸쭉하고 포함된 512KB 전용 저장 공간입니다. 세르비아 모바일 사업자가 발급한 암호화된 프로필을 저장하도록 특별히 설계되었습니다.
-
EID 화면에 “알 수 없음” 또는 “초기화되지 않음”이 표시되지 않도록 하십시오.”
-
메모해 두세요 마지막 네 자리 백업용으로 EID를 사용하다.
-
설치 중 화면 밝기 변경에 대비하여 EID 화면을 스크린샷으로 찍어두세요.
-
EID가 정확히 있는지 확인 32자리 긴.
-
EID 제조업체 코드가 주요 국제 공급업체에 속하는지 확인하십시오.
세르비아에서는, 엠티에스 식별자를 사용합니다 MCC 279 그리고 MNC 03. 기지국은 EID와 핸드셰이크를 통해 256비트 암호화. eSIM을 설치하면 휴대폰은 이 하드웨어 ID를 원격 서버로 보냅니다. 서버는 확인이 성공한 후에야 약 120KB.
EID가 누락된 경우, 휴대폰 요금제 추가 휴대폰 설정에 있는 메뉴가 제대로 작동하지 않습니다. 칩은 안정적인 1.8V 작동 중에 전원 공급이 중단됩니다. 이 하드웨어 수준 바인딩은 세르비아 번호가 복제되는 것을 방지하며, 이는 특히 발칸 반도 전역의 공용 네트워크를 사용할 때 중요합니다.
-
iPhone 13 및 최신 모델은 더 많이 저장할 수 있습니다. 8 EID 기반 프로필.
-
삼성 갤럭시 S 시리즈 기기에서 EID는 내부에 저장됩니다 티 보안 실행 환경.
-
Google Pixel 7에서 EID는 두 번째 IMEI에 밀접하게 연결됩니다.
-
숫자 13세에서 15세 EID는 하드웨어 배치(batch)를 자주 나타냅니다.
-
일부 기기는 인증된 EID 칩을 사용합니다 CC EAL4+ 보안 표준.
베오그라드 중앙부에서는 휴대폰이 자주 바뀌어요 1800MHz (밴드 3) 스펙트럼. EID 칩은 초당 여러 번 기지국에서 인증 토큰을 처리합니다. 이 하드웨어 기반 방식은 약 40% 더 빠르게 구형 플라스틱 SIM 카드의 읽기/쓰기 속도보다. 네트워크 지연 시간 감소의 많은 부분은 EID 읽기/쓰기 작업의 효율성에서 비롯됩니다.
만약에 *#06# IMEI만 표시되고 EID는 표시되지 않으면 휴대전화는 물리적으로 eSIM 기술을 지원하지 않는 것입니다. 이 경우 어떤 세르비아 데이터 패키지를 구매하든 설치할 수 없습니다. 결제 전에 이 점을 다시 확인하십시오. EID에서 오류가 발생하면 나중에 대면 지원을 통해 해결할 수 있습니다. 니콜라 테슬라 공항 시간이 매우 많이 소요될 수 있습니다.
-
배터리를 이상으로 유지하세요 20% EID를 확인하는 동안.
-
EID 화면에 표시되지 않도록 하십시오. 하드웨어 잠금 레이블.
-
이전 여행에서 남은 잘못된 EID 레코드를 제거하세요.
-
EID에 연결된 eUICC 펌웨어가 지원하는지 확인 v2.0 조만간.
-
전화기 상자의 EID 스티커와 시스템에 표시된 번호를 비교하세요.
설치 중에 휴대폰은 로컬 프로비저닝 도우미를 실행합니다. 사이트맵. 이것은 세르비아 운영자의 개인 키를 EID 칩의 보호된 섹터에 씁니다. 이 과정은 보통 15초에서 30초. EID가 잘못 입력되거나 스캔이 불분명하면 칩 보안을 위해 즉시 다운로드가 중단됩니다.
국경 지역의 일부 사용자들은 서보티차 불안정한 신호를 보고하며, 이는 EID 칩의 대역 탐색 전략과 관련이 있을 수 있습니다. 최신 운영 체제로 업데이트하면 EID가 더 잘 작동하게 됩니다. 예텔 (MNC 05) 기지국. 4G 네트워크에서는 EID 관리 데이터 처리량이 꾸준히 높게 유지될 수 있습니다.
-
설정 메뉴에서 EID 번호를 길게 누르면 즉시 복사됩니다.
-
사업자 블랙리스트에 EID가 있는지 확인합니다.
-
전화기가 EID 전환을 지원하는지 확인 단일 심장박동 보조 장치 듀얼 SIM 듀얼 대기 모드.
-
EID 촬영 시 화면이 빛에 반사되지 않도록 하여 숫자가 선명하게 보이도록 하십시오.
-
EID가 휴대폰 일련 번호와 함께 클라우드에 동기화되었는지 확인합니다.
휴대폰 전원을 켜는 순간, 착륙 시 니콜라 테슬라 공항, 지역 기지국이 귀하의 EID를 캡처합니다. 백엔드 시스템은 엠티에스 또는 A1 (MNC 01) 그런 다음 해당 EID에 유효한 데이터 패키지가 첨부되어 있는지 확인합니다. 일치가 성공하면 데이터 링크는 다음 내부에서 설정됩니다. 5초. 이 하드웨어 지문 기반 인증을 통해 세르비아 여행 중 물리적인 SIM 카드를 교체할 필요가 없습니다.
모든 EID는 전역적으로 고유한 PKI 인증서. 이는 세르비아에서 사용하는 모든 메가바이트의 데이터가 보호된다는 것을 의미합니다. 이러한 하드웨어 수준의 신뢰 모델은 일반적인 선불 물리 SIM 카드로는 따라갈 수 없습니다. 이는 원격지에서 인터넷 트래픽이 악의적으로 가로채는 것을 방지하는 데 도움이 됩니다. 800MHz (밴드 20) 보장 범위.
-
EID 칩이 유지될 수 있는지 확인 1.8V 극한 온도에서도 공급.
-
EID 관리 화면에서 수동 입력을 지원하는지 확인합니다. SM-DP+ 이름 *.
-
EID를 포함하는 저장 파티션이 가득 차지 않았는지 확인합니다.
-
EID가 세르비아 현지 지원을 하는지 확인하십시오. 5G 시험 주파수.
-
이전 계획을 삭제하기 전에 현재 EID 구성을 백업하십시오.
EID 화면이 비어 있거나 0으로 표시되면 네트워크 설정을 초기화해 보십시오. 그래도 해결되지 않으면 해당 기기는 세르비아에서 물리적 SIM만 사용할 수 있습니다. 미리 확인하면 최소한 시간을 절약할 수 있습니다. €50 잘못된 구매와 더불어 많은 시간과 번거로움을 겪게 됩니다.
네트워크 잠금
전화기 마더보드가 eSIM을 지원하더라도 시스템 내부의 통신사 잠금으로 인해 세르비아 데이터 요금제를 설치할 수 없습니다. 이것은 계약폰에서 흔히 볼 수 있는 현상으로, 통신사에서 펌웨어를 제한하여 기기가 특정 신호만 읽도록 합니다. MCC (모바일 국가 코드). 베오그라드로 비행하기 전에 휴대폰이 완전히 제한 없음. 그렇지 않으면, 코드를 스캔한 후 다음과 같은 오류가 발생할 가능성이 높습니다. “셀룰러 요금제 변경을 완료할 수 없습니다.”
아이폰에서 다음 경로로 이동하세요. 설정 > 일반 > 정보 이름 * 캐리어 잠금장치. 만약 그것이 말한다면 SIM 제한 없음, 휴대폰은 완전히 잠금 해제되었으며 다음과 같은 세르비아 네트워크를 로드할 수 있습니다. 엠티에스 또는 A1 언제든지. 통신사별 제한이 표시되는 경우, 이 기기는 소프트웨어적으로 잠겨 있는 것이며, 원래 계약 통신사 외 다른 제공업체의 eSIM QR 코드는 차단됩니다.
-
확인해 주세요 캐리어 잠금장치 이름 * SIM 제한 없음.
-
이전 계약이 완료되었음을 확인하십시오. 12개월 또는 24개월, 해당되는 경우.
-
계정에 미납 금액이나 연체료가 없는지 확인하세요.
-
기기가 놓여있는지 확인 GSMA 국제 블랙리스트 분실 또는 도난으로 인해.
-
휴대폰이 통신사별 지역 모델이 아닌, 잠금 해제된 일반 판매 모델인지 확인하십시오.
중고 거래 플랫폼에서 판매되는 많은 휴대폰에는 사용자들이 비공식적으로 ~라고 부르는 것이 있을 수 있습니다. 숨겨진 잠금. 이러한 장치들은 종종 일반적인 물리 SIM 카드를 사용할 수 있지만, 새로운 디지털 요금제를 추가할 수는 없습니다. 다른 통신사의 물리 SIM 카드를 삽입하여 테스트할 수 있습니다. 전화기에서 즉시 다음을 요청하는 경우 SIM 네트워크 잠금 해제 PIN, QR 코드를 스캔하여 세르비아 eSIM을 직접 설치할 수 없습니다.
휴대폰이 아직 계약 기간 중이라면, 최소한 원래 통신사에 연락하는 것이 가장 좋습니다. 48시간 전 잠금 해제를 요청하려면. 고객 서비스에서는 일반적으로 다음을 요청할 것입니다. 15자리 IMEI 백엔드 상태를 확인합니다. 승인되면 서버는 약 OMB의 정책 파일을 보냅니다. 5KB 시리즈 전화기로. 작지만, 해당 파일은 전화기가 세르비아 기지국과 인증 핸드셰이크를 수행하도록 허용되는지 여부를 결정합니다.
-
통신사 고객 지원 센터에 전화하여 요청하십시오. 국제 해제.
-
공식 앱에서 잠금 해제 요청을 제출하고 저장하세요 요청 ID.
-
요청 후, 허용 24시간에서 72시간 서버 동기화를 위해.
-
잠금 해제가 승인되면 저수준 인증 파일을 새로 고치려면 휴대전화를 다시 시작하십시오.
-
확인하십시오 eSIM 추가 시스템 메뉴의 옵션이 더 이상 회색으로 표시되지 않습니다.
일부 통신사는 해외 여행객에게 임시 승인만 제공하며, 이 승인은 종종 만료됩니다. 영구 잠금 해제가 더 안전한 선택입니다. 통계에 따르면 약 3.5% 여행객들은 보통 이 단계를 놓치고 도착한 후에 온라인에 접속하지 못하는 경우가 많습니다 니콜라 테슬라 공항. 이 유형의 잠금은 디지털 인증서 검증을 통해 낮은 수준에서 시행되며, 현재 신뢰할 수 있는 소프트웨어 해결책은 없습니다.
휴대폰이 다음과 같이 변경될 때 뚱 베어 에게 옵션 정보, 기저대역 칩은 검증 데이터를 재계산합니다. 이때 제조사 서버로부터 새로운 인증 토큰을 요청해야 하므로 기기를 안정적인 Wi-Fi에 연결해야 합니다. 세르비아에서 eSIM을 사용하는 경우, 휴대전화는 효과적으로 현지 사용자처럼 인식됩니다. 이전 네트워크 잠금 로직이 아직 활성화되어 있다면, 기기는 세르비아의 MCC 279 허가되지 않은 신호로 간주하고 연결을 끊습니다.
-
“계획을 추가할 수 없습니다” 일반적으로 네트워크 잠금이 여전히 적용 중임을 의미합니다.
-
“유효하지 않은 SIM” 이는 전화기가 해당 통신사를 승인되지 않은 것으로 인식한다는 의미입니다.
-
“잠금 해제 코드를 입력하세요” 장치가 요청 중이라는 뜻입니다 8~16자리 잠금 해제 코드.
-
“시도 횟수가 너무 많습니다” 잘못된 입력이 반복되어 잠금 수준이 높아졌음을 의미합니다.
-
“활성화 서버를 사용할 수 없습니다” 네트워크 연결이 끊기는 동안 인증 파일이 전달되었습니다.
일부 특정 모델에서는 인터페이스에 장치가 잠금 해제된 것으로 표시되더라도 상태 새로고침을 트리거하려면 특정 키 조합이 필요할 수 있습니다. 세르비아의 4G 네트워크는 인증에 엄격하며, 사소한 구성 충돌이라도 신호 아이콘이 다음과 같이 고정될 수 있습니다. 서비스 없음. 이 하드웨어 수준의 화이트리스트 시스템은 규정을 준수하는 장치만 세르비아의 800MHz (밴드 20) 스펙트럼 리소스.
개인 판매자로부터 휴대폰을 구매하셨다면 전문가에게 맡겨 점검해 보는 것이 좋습니다. IMEI 상태 확인. 일부 장치는 겉보기에는 사용 가능한 것처럼 보이나, 플래그가 지정되어 있습니다 뚱 베어 보험 청구 또는 기타 문제로 인해 데이터베이스에 해당 항목이 있을 경우 해당 잠금은 해제할 수 없습니다. 유효한 로컬 QR 코드가 있더라도 휴대폰은 세르비아에서 작동하지 않습니다. 이것은 저렴한 데이터 요금제를 구매할 때 가장 흔하게 간과되는 위험 중 하나입니다.
-
둘 다 하지 않도록 하세요 IMEI 1 이름 * IMEI 2 모든 글로벌 도난 장치 데이터베이스에 나타납니다.
-
일반 프로필로 캐리어 정책 ID가 설정되었는지 확인하십시오. 2300.
-
남은 것이 없는지 확인해 주세요 MDM 휴대폰의 기업 관리 프로필.
-
Wi-Fi 없이 전화기가 외국 물리 SIM을 읽을 수 있는지 테스트합니다.
-
휴대폰이 언락된 후 비공식적인 시스템 다운그레이드를 거치지 않았는지 확인하십시오.
잠금 해제된 휴대폰은 예를 들어 세르비아 도시를 이동할 때 기지국 간 전환도 더 원활하게 이루어집니다. 노비사드 에게 니시. 네트워크 잠금 신호가 방해가 되지 않아 기저대역 프로세서는 약 200밀리초 요청 시마다. 구글 지도 사용 시 또는 소셜 미디어 스크롤 시 차이를 느낄 수 있습니다. 숙련된 여행자들이 공장 출고 시 언락된 휴대폰이 더 잘 작동한다고 말하는 정확한 이유입니다.
이따금, 전화기를 잠금 해제한 후 동기화 도구가 수행할 수 있도록 컴퓨터에 연결해야 합니다. 활성화 새로고침. 이 과정은 내부 키를 다시 작성하고 휴대폰이 올바르게 해석할 수 있도록 합니다 TMSI (임시 이동 전화 가입자 식별 번호) 세르비아 기지국에서 보낸 지침입니다. 이를 건너뛰면 신호 막대가 표시되어 웹페이지를 로드하지 못할 수 있습니다. 이상적으로는 이 동기화는 최종 단계에서 수행해야 합니다. 24시간 출발 전.
-
전화를 컴퓨터에 연결하고 진단을 위해 공식 관리 소프트웨어를 실행하십시오.
-
수동으로 클릭 업데이트 확인 최신 통신사 설정 번들을 가져오기 위해.
-
시스템이 최신 인증 상태를 스캔하도록 기기를 연속으로 두 번 다시 시작하세요.
-
열려 있는 eSIM 추가 워크플로우가 원활하게 실행되도록 셀룰러 메뉴에서 반복적으로 확인하세요.
-
최소한 확보 200MB 새 네트워크 프로필을 위한 저장 공간.
세르비아에서 렌터카를 운전할 계획이라면, 전화가 자주 재연결되는 국경 지역을 자주 지나게 될 것입니다. 완전히 잠금 해제된 기기는 이러한 전환 중에 가장 강력한 대역에 더 빨리 연결될 수 있습니다. 세르비아에서는, 밴드 3 (1800MHz) 는 도심 커버리지를 위한 주요 대역입니다. 네트워크 잠금 로직의 간섭 없이 휴대폰의 RF 구성 요소는 자동으로 최상의 경로를 선택하여 대략적으로 절약할 수 있습니다. 15% 대기 배터리 사용량.
마지막으로, 잠금 해제 상태가 때때로 시스템 버전에 따라 달라질 수 있음을 명심하십시오. 매우 오래된 펌웨어에서는 일부 잠금 해제 프로토콜이 세르비아의 최신 버전에 제대로 작동하지 않을 수 있습니다. 5G 시험 주파수. 출발 전에 안정적인 브로드밴드 연결을 사용하여 휴대폰을 최신 안정 버전 펌웨어로 업데이트하십시오. 이렇게 하면 대부분의 오작동을 제거할 수 있으며, 세르비아에 도착하는 즉시 현지 시스템에서 eSIM 식별자를 거의 즉시 인식할 수 있습니다.
-
확인하십시오 지원하다 그리고 지원하다 시스템 백엔드에 이미 연결되었습니다.
-
잠금 해제 상태가 수동 입력을 지원하는지 확인 SM-DP+ 이름 *.
-
스토리지 파티션이 오래된 불필요한 파일로 가득 차지 않도록 하십시오.
-
장치가 세르비아의 로컬 기지국 인증 프로토콜을 지원하는지 확인합니다.
-
이전 계획을 삭제하기 전에 현재 잠금 해제 상태 자격 증명을 백업하십시오.
시스템 버전 & 주파수 대역
iOS 17.4 이상 그리고 안드로이드 14 최신 지원 GSMA SGP.32 표준. 예를 들어, 구형 시스템에 세르비아 eSIM을 설치하려고 하면 iOS 13, 내장된 로컬 프로비저닝 지원 도우미는 대략 이쯤에서 쉽게 멈출 수 있습니다. 90%. 이는 구형 보안 샌드박스에서는 세르비아 발급 암호화 인증서를 인식할 수 없기 때문입니다. 엠티에스 작동자가 작동 과정을 차단시킵니다.
이동통신사 설정 버전을 확인하고 업데이트하세요. 50.0 가능하다면 빠를수록 좋습니다. 베오그라드의 기지국은 이미 배포되었습니다 LTE-어드밴스드 광범위하게. 설정 번들이 너무 오래되면 휴대폰이 보내는 네트워크 우선순위 지침을 이해하지 못할 수 있습니다. MTS (MCC 279). 국경 지역과 같이 서보티차, 이는 잦은 끊김을 유발할 수 있으며, 패킷 손실이 약 1% 넘어서 15%.
-
~ 안에 정보, 이동통신사 설정 버전이 이상인지 확인하십시오 50.0.
-
휴대전화에 최신 보안 패치가 설치되어 있는지 확인하세요.
-
3년 전 구식 버전의 베이스밴드 펌웨어가 아닌지 확인하십시오.
-
전화가 지원하는지 확인 VoLTE.
-
설정에서 옵션을 찾아 확인하세요 데이터 로밍 활성화할 수 있습니다.
-
장치가 지원되는지 확인 듀얼 SIM 듀얼 대기 네트워크 검색 로직.
세르비아의 요텔 그리고 A1 네트워크는 전화기가 지원해야 합니다 VoLTE 인증. 시스템 버전이 너무 오래된 경우, 통화 중에 4G 데이터가 끊기고 3G로 전환될 수 있습니다. 해당 전환으로 인해 10초에서 20초 Google 지도 내비게이션의 오프라인 연결 끊김 현상. 최신 안정화 버전으로 업데이트하면 음성 및 데이터 모두 4G 상태를 유지합니다.
소프트웨어 다음으로 확인할 것은 안테나 시스템의 하드웨어 쪽입니다. 세르비아에서 주요 4G 역할을 하는 것은 밴드 3 (1800MHz). 그것은 약 65% 국가 모바일 트래픽 중. 휴대폰이 지원하지 않는 경우 4×4 MIMO, 고부하 지역에서 다운로드 속도가 크네즈 미하일로바 거리 베오그라드에서는 이론적으로 드롭할 수 있습니다 150Mbps 대략 12Mbps.
강변 오두막 같은 곳으로 향할 때 드린 강 또는 산악 지역, 밴드 20 (800MHz) 필수적입니다. 더 긴 파장은 단일 기지국이 최대 반경을 커버할 수 있도록 합니다. 15km. 휴대폰이 지원하지 않는 경우 사이트맵, 그것은 단순히 보여줄 수 있다 서비스 없음 시골 지역에서. 측정된 신호 강도가 -90dBm, 전화기가 지원되지 않는 채널 때문인지 여전히 연결되지 않습니다.
-
RF 사양서를 확인해 주세요 LTE 주파수 대역 1, 3, 7, 8, 20.
-
장치가 지원되는지 확인 CA (주파수 집성) 조합.
-
안테나 이득이 포착되는지 확인하십시오 2600 MHz (밴드 7) 신호.
-
송신 전력 확인 800 MHz의 요구 사항을 충족합니다.
-
모뎀 지원 확인 256-QAM 수정.
-
수신 감도 수치를 검토하십시오 사이트맵.
베오그라드 일부 지역에서 시험을 진행하고 있습니다 5G N78 (3.5GHz) 커버리지. 대부분의 세르비아 eSIM은 여전히 주로 4G로 작동하지만, 시스템이 5G 모드를 지원하는 경우 휴대폰이 4G에 더 효율적으로 연결될 수 있습니다. 이를 통해 네트워크 획득 시간을 줄일 수 있습니다. 10초 에게 2초, 네트워크가 도시 간 이동 시 더 반응성이 좋게 느껴지도록 합니다.
다른 베이스밴드 펌웨어 버전도 다르게 반응합니다 A1의 MNC 01 세르비아의 코드. 실제 테스트에서 최신 펌웨어가 설치된 휴대폰은 위치 업데이트 요청을 단 몇 초 안에 완료할 수 있습니다. 5초에서 8초 비행기 모드를 해제한 후. 이전 펌웨어는 불필요한 네트워크 스캔을 반복하는 경향이 있어 RF 모듈에 추가적인 부담을 주고 대기 전력 소모를 약 시간당 35mA.
휴대폰의 시스템 버전은 또한 다음과 같은 권한을 제어합니다. LPA (지역 프로필 어시스턴트). 세르비아 eSIM의 QR 코드를 스캔하면 시스템에서 기기 인증서를 서버로 전송합니다. 소프트웨어 버전이 너무 오래되었고 인증서 체인이 만료된 경우, 서버는 제공을 거부합니다. 120KB 프로필 파일입니다. 재시작해도 해결되지 않습니다. 펌웨어를 Wi-Fi를 통해 미리 업데이트해야 합니다.
남부 세르비아의 산악 지역에서는 신호가 이웃한 셀 간에 자주 전환됩니다. iOS 16.0 이상 아이폰 또는 안드로이드 13+, 저수준 스케줄러는 사용할 수 있습니다 RSRP (기준 신호 수신 전력) 더 정확하게 언제 인계할지 결정할 수 있습니다. 이러한 지능적인 동작은 드롭율을 감소시킬 수 있습니다 20%, 라이드를 주문하거나 번역을 확인할 때 연결을 안정적으로 유지합니다.
RF 프론트엔드에서, 밴드 7 (2600MHz) 은 주로 시내 중심가의 추가 용량으로 사용됩니다. 예를 들어 레드 스타 스타디움 경기 중이나 리버보트 파티에서, 전화기가 없으면 사이트맵 지원군이 모여들도록 강요받다 사이트맵. 그러한 상황에서는 신호 막대가 가득 차 있어도 실제 핑은 초과할 수 있습니다. 300 밀리 초. 전대역 지원 장치는 더 높은 주파수로 전환하고 원활한 영상 통화를 유지할 수 있습니다.
-
휴대폰의 하드웨어가 유럽 주파수 대역에 대해 RF 보정되었는지 확인하십시오.
-
네트워크 감지를 방해할 수 있는 이전 VPN 또는 프록시 도구를 비활성화합니다.
-
이중 연결 안정성 확인 1800MHz.
-
세르비아 통신사 핸드오버 표준 지원 확인.
-
새 네트워크 드라이버 패키지를 수신할 수 있도록 충분한 여유 저장 공간을 확보하세요.
세르비아에서도 네트워크 검색 로직이 중요합니다. 휴대폰은 일반적으로 저장된 화이트리스트에 따라 검색합니다. STK (SIM 툴킷). 최신 시스템은 eSIM이 보다 유연하게 신호를 비교하도록 허용한다 엠티에스, 요텔, 그리고 A1. 이런 식으로, 메인 네트워크 성능이 좋지 않은 계곡에서도 시스템은 메시지를 보내기 위한 백업 경로를 찾을 수 있으며, 이는 긴급 상황에서 매우 유용할 수 있습니다.
몇 년 전의 구형 휴대폰을 사용하는 경우 QR 코드가 성공적으로 설치되더라도 누락된 밴드 8 (900 MHz) 지원되는 대역이 일부 실내에서는 여전히 신호가 끊길 수 있습니다. 세르비아 사업자들은 오래된 도시 지역에서 깊은 커버리지를 위해 이 대역을 사용합니다. 베오그라드에 있는 모든 순간 연결을 유지할 수 있도록 휴대폰 사양을 주의 깊게 확인하여 이러한 모든 주요 LTE 대역이 지원되는지 확인하십시오.
-
검색 eSIM 설정으로 이동하여 전용 관리 페이지를 엽니다.
-
EID가 포함된 하드웨어 파티션이 가득 차지 않았는지 확인합니다.
-
이전 국가에서 남은 오래된 APN 설정을 수동으로 지우십시오.
-
휴대폰이 수동으로 잠그는 것을 지원하는지 확인하세요 4G만.
-
최신 시스템 업데이트 이후 휴대폰을 적어도 두 번 다시 시작했는지 확인하십시오.
QR 코드 설정 튜토리얼
iOS (아이폰)
휴대전화가 실행 중이어야 합니다 아이폰 OS 12.1 이든 늦든. 열기 설정, 탭 세포, 그리고 당신의 주요 줄 아래에 eSIM 추가. 실행 중인 기기 iOS 17.4 늦든 빠르든, 옵션이 보일 것입니다. QR 코드를 사용하세요.
구매 이메일에서 받은 고해상도 QR 코드를 카메라 프레임 중앙에 놓으세요. 환경이 너무 어두워 코드가 인식되지 않으면, QR 코드가 표시된 다른 화면의 밝기를 높이세요. 코드가 인식되면, 계속하다 버튼이 화면 하단에 나타납니다.
QR 코드가 사진 보관함에 저장되어 있다면, 탭하세요 사진 열기 그리고 이미지를 선택하세요. 일부 구형 모델은 사진 라이브러리에서 스캔하는 것을 지원하지 않으므로, 이 경우 탭해야 합니다. 세부 정보를 수동으로 입력하세요. 입력 SM-DP+ address carefully, usually beginning with rsp.global.
The activation code is typically a 32문자 string. Check every uppercase and lowercase letter carefully as you enter it. Once submitted, the phone sends a configuration request of about 1MB to the carrier server. The download process usually takes between 30 and 120 seconds.
-
Label: 위에 Cellular Plan Label screen, choose 여행하다.
-
Rename: Manually name it “Serbia eSIM” for easier management.
-
Default number: Keep your primary line for calls.
-
Cellular data: 이름 * 셀룰러 데이터 to the newly installed Serbian plan.
확인하기 셀룰러 데이터 전환 허용 is turned off. If it stays on, the system may automatically switch back to your primary SIM’s international roaming data whenever the Serbian signal weakens, which can cost more than $2 per MB.
Once installation is complete, you will see two lines listed under 세포. Since you have not yet arrived in Belgrade, the signal status may show 서비스 없음. For now, switch that eSIM line to 끄다.
This prevents the phone from constantly searching in the background across the 800/1800/2100 MHz bands. iPhone 13 and newer models support running two eSIMs at the same time. The device can store more than 8 profiles internally, but no more than 2 can be active at once.
-
Check the EID: ~ 안에 정보, find the 32자리 device identifier.
-
Unlock status: 확인하기 캐리어 잠금장치 이름 * SIM 제한 없음.
-
Save a record: Take a screenshot of the email that includes the confirmation code.
After landing at 니콜라 테슬라 공항, go back into 세포. 오픈 Serbia line and switch it ~에. Then wait for the device to complete IMSI authentication with the local base station.
기타 제품 데이터 로밍 manually. Most travel eSIMs rely on third-party network transit, and without roaming enabled, they will not establish a data session. Your phone may connect to local networks such as A1 (220 05) 또는 Yettel (220 01).
If the top of the screen still does not show 4G 또는 5G, toggle 비행기 모드 on and off once. This forces the 기본밴드 processor to search for a base station again. If the phone still cannot get online, go into 셀룰러 데이터 네트워크 and check the APN.
Enter the APN specified in the email, such as 글로벌데이터. Leave the username and password blank. If you plan to use hotspot sharing, enter the same APN in the 개인용 핫스팟 section at the bottom of the page.
-
Network search: Signal acquisition usually takes around 3분.
-
Band support: Make sure the device supports B3 (1800 MHz).
-
Hotspot limits: Some plans impose a tethering cap.
If you get the error “Unable to complete cellular plan change” during installation, it is usually caused by network instability. In that situation, do ~ 아니다 기타 제품 Delete eSIM. The eSIM profile contains a unique ICCID, and once deleted, that QR code will become permanently invalid.
Each QR code is usually valid for one scan only. If you change phones, you will need to contact the provider to generate a new one. It is best to complete installation about 24 hours before departure so that your data connection is ready as soon as you land.
~ 안에 설정 > 셀룰러, confirm that the Serbia line is enabled. Under 셀룰러 데이터, make sure that line is selected. At that point, your status bar should show the local carrier name and signal bars.
을 위한 아이폰 14 and later models without a physical SIM slot, the setup process is exactly the same. Make sure you do it on a stable Wi-Fi connection. While the profile is downloading, do not lock the screen or switch to another app, as that may interrupt the process.
If you see “PDP authentication failed,” try resetting network settings or restarting the device. A reboot resets the phone’s network stack and resolves about 90% of connection handshake issues. Also make sure there is enough free storage before installation. The package is small, but it still uses system cache.
안드로이드 (삼성 / 픽셀)
Phones running Android 10 or later generally support eSIM. On Samsung devices, go to 설정 > 연결 > SIM 카드 관리자. On Google Pixel, go to 네트워크 및 인터넷 그리고 탭 + sign next to 심즈.
You will see 모바일 플랜 또는 다운로드 eSIM. Tap it and the camera will open. Place the QR code from the confirmation email inside the frame. It is best to set the brightness on the other display to above 60% 그래서 LPA (지역 프로필 어시스턴트) can recognize the code quickly.
Once recognized, the system will prompt you to download the plan. The eSIM profile is about 2MB. After you tap 이름 * 또는 기타, the phone establishes a handshake with the remote server. This takes about 30초에서 90초, and you should not switch Wi-Fi networks during the process.
-
Manual entry: If scanning fails, tap Use activation code.
-
SM-DP+ address: Enter the string beginning with
rsp.global. -
Activation code: Enter the corresponding 32문자 alphanumeric code.
-
Confirmation code: Some plans also require the 4-digit confirmation code from the email.
~ 안에 SIM 카드 관리자, the newly installed line may show as Pending activation 또는 서비스 없음. Tap the line, choose Edit name, and enter “Serbia eSIM.” Samsung also lets you assign an icon to the line; an envelope or airplane icon is a practical choice.
After installation, leave the line switched 끄다 for the moment. That prevents the phone from repeatedly searching outside Serbia across B1 (2100 MHz) 또는 B3 (1800 MHz). Excessive base-station polling can increase battery drain by about 15%.
~ 안에 Preferred SIM card, 계속 통화 그리고 이름 * assigned to your original physical SIM. Assign 모바일 데이터 to the newly added Serbian plan. On Pixel devices, make sure Automatically switch mobile data 설정 뚱 베어.
-
Band coverage: Serbia mainly uses 800/1800/2100 MHz.
-
Carrier codes: MTS = 220 03, A1 = 220 05, Yettel = 220 01.
-
Storage: Android devices can usually store 5에서 7 eSIM profiles.
-
Active limit: Most models support only one active eSIM at a time.
After landing in Belgrade, return to SIM 카드 관리자 및 스위치 “Serbia eSIM” on. Wait for the signal bars at the top of the screen to turn solid, which usually takes about 2분.
Then go into 모바일 네트워크 설정 및 켜기 데이터 로밍 for that eSIM. Without roaming enabled, the data layer cannot establish the GTP tunnel. Even if signal bars appear, no webpages will load.
If you have signal but no internet access, check the APN(액세스 포인트 이름). 오픈 액세스 포인트 이름 and see whether it has auto-filled 인터넷 또는 글로벌데이터. If the field is blank, tap 기타 and enter the values manually.
-
APN name: Enter the exact value provided by the operator.
-
Proxy / Port: Leave both Not set or blank.
-
MCC / MNC: These are usually filled automatically as 220 plus the relevant code.
-
APN type: 입력하다
default,supl.
Save the settings. If the connection still drops, turn 비행기 모드 제품 정보 5초, then turn it off. This resets the RIL (Radio Interface Layer) daemon and forces the phone to request a fresh IP assignment from the base station.
For Samsung users, Error code 0.0.0 usually means the Wi-Fi network has a firewall enabled. Try a different network or a phone hotspot. If you see “Profile already in use,” that means the QR code has already been consumed.
-
EID check: ~ 안에 휴대폰에 관하여, 보기 32자리 EID.
-
IMEI2: The eSIM usually occupies the phone’s second IMEI slot.
-
Network mode: Make sure it is set to 5G/4G/3G/2G (auto connect).
-
Developer options: If you cannot find the eSIM menu, check whether 단일 심장박동 보조 장치 mode is enabled.
In remote parts of Serbia, such as Drvengrad or certain mountain areas, if the signal keeps switching between 4G 그리고 H+, it is best to lock the device to 4G만 in settings. This helps prevent repeated 3G authentication from causing connection drops.
Once installation succeeds, do ~ 아니다 기타 제품 Remove plan 또는 Delete eSIM in system settings. On Android, deletion is a real wipe. Once executed, the embedded ICCID data cannot be recovered. If you only want to stop using it temporarily, simply switch the line off.
It is best to complete the QR scan around 12 hours before departure. Successful installation does not necessarily mean billing starts immediately. Most plans only begin their 24 시간 timer once they detect a base station inside Serbia. Setting it up early helps you avoid download failures caused by unstable airport Wi-Fi.
If the authentication portal does not appear at 니콜라 테슬라 공항, check your DNS settings. Go to Private DNS and change it to 오토매틱 또는 끄다. A custom DNS may block the local carrier’s activation page.
Keep at least 500MB of free storage on your phone. The profile itself is small, but the system needs cache space when unpacking the LPA image. If the phone is in the middle of a system update, wait until the update is complete before scanning the QR code.
세르비아에 도착했을 때 해야 할 일
eSIM 회선 설정
Once the plane has stopped taxiing at Nikola Tesla Airport (BEG), Terminal 2, open your phone settings. Go to the 세포 list, tap the Serbian eSIM label you downloaded earlier, and switch it from 끄다 에게 ~에.
이름 * 셀룰러 데이터, select this new line. Keep your primary number enabled for calls, but disable data switching on that line. This prevents the phone from falling back to your original, high-cost roaming network whenever the eSIM signal is weak.
-
데이터 로밍: You must manually turn on 데이터 로밍 within the eSIM settings.
-
로밍 게이트웨이: Most travel data plans are routed through gateways in Frankfurt or Warsaw. Without roaming enabled, you will not receive a local 10.x.x.x private IP.
-
Network mode: 4G/LTE is the safest choice. Belgrade’s 5G coverage is still in 3.5GHz trial deployment, and locking to 4G can reduce battery drain by about 15%.
Wait for the device to complete its handshake with the local base station. The carrier name usually appears on screen within 90초. MTS (Telekom Srbija) 사용 방법 PLMN code 220-03, and its 800MHz (B20) coverage is particularly strong indoors.
Even inside the thick concrete structure of the terminal, a signal level of -95dBm의 can still support download speeds above 20Mbps. If the signal bar keeps showing 수색· 네트워크 선택, disable automatic selection, and manually choose A1 또는 요텔 목록에서.
A1 has Serbia’s widest B3 (1800MHz) spectrum bandwidth and can deliver download speeds of around 120Mbps 시리즈 in dense urban areas such as 크네즈 미하일로바 거리. 요텔 performs steadily on the 2100MHz의 band. Manually locking to one network can reduce dropouts caused by frequent switching between base stations.
-
APN 검사: Go into cellular data network settings and confirm the APN.
-
Required value: Make sure the APN field is set to
인터넷or to the provider’s specific code, such as글로벌데이터. -
Reset step: If the settings do not take effect, turn on airplane mode for 10초, then switch it off to force the radio module to rescan nearby base stations.
Once you are online, check whether 4G 또는 LTE appears next to the signal bars immediately. Open a browser and access a local site to test latency. Because the data often routes back through a European gateway, ping to Belgrade servers is usually around 60ms의.
While waiting for your luggage, open the eSIM provider’s app and check the remaining data balance. A newly activated plan should show the full allowance, such as 1GB, 3GB, 또는 10GB. Confirm that the validity period has started counting down from the current activation time.
After leaving customs, avoid the illegal drivers soliciting rides outside the exit. Look for the blue Taxi Info booth. Show them your destination and get a fixed-fare paper voucher. The standard fare to the city center’s Zone 1 이름 * 2200 RSD, 동안 Zone 2 이름 * 3000 RSD.
-
Using CarGo: Open the local ride-hailing app CarGo, which is typically about 20% 저렴 than a taxi.
-
Payment: The app accepts 비자 그리고 마스터 카드, so there is no need to carry cash converted at a 117.1 RSD exchange rate.
-
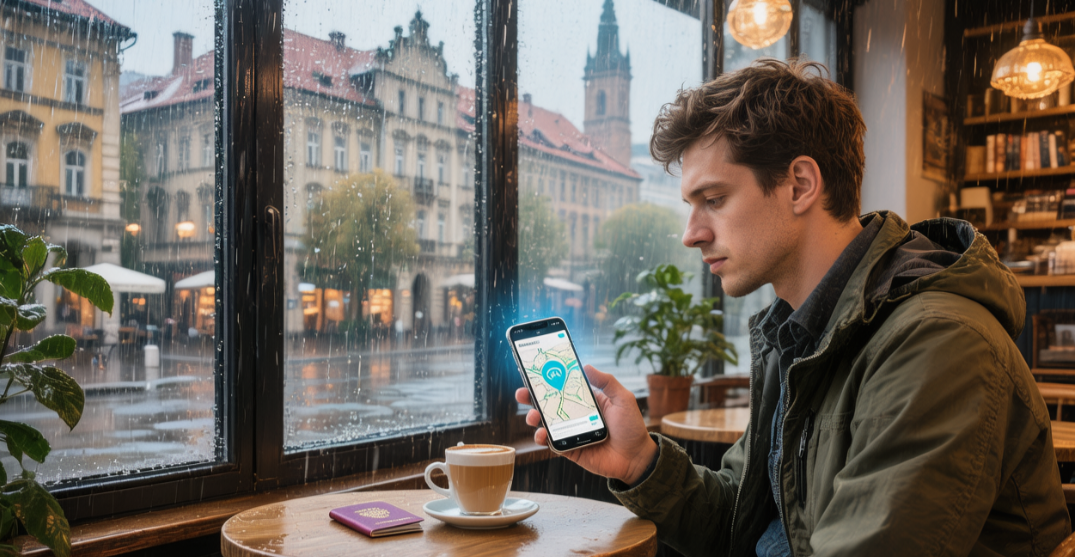
Location sharing: With your eSIM connection, you can see in real time whether the driver is closer to exit A, B, or C.
제품 정보 구글 지도 to plan your trip into the city. Bus 72 소송 비용 50 RSD, and tickets must be purchased online through the Beograd Plus app. The app requires a stable data connection. Real-time location updates for tram 16 또는 A1 airport bus refresh every 30초.
Belgrade’s public transport system is fully digital. In the app, choose a 90-minute ticket and pay with your international credit card over your eSIM connection. Make sure the QR-code ticket is saved locally in case an inspector asks to see it.
When walking along the Sava riverfront or through the cobbled streets of the old town, Google Lens is extremely useful for reading Cyrillic signs. A single translated screenshot uses about 500KB 시리즈 of data. The 4G bandwidth from your eSIM is more than enough for instant translation of menu items such as Ћевапи (ćevapi).
If you lose signal in a basement or an old elevator, the phone will automatically try to reconnect. At the edge of coverage, the 800MHz B20 band is still good enough for basic messaging apps. Even at just 1Mbps, map navigation remains usable.
-
Data warning: Set a data limit for the eSIM in system settings to prevent background app updates from consuming your allowance.
-
Backup option: Save the provider’s support email. If something goes wrong, the free Wi-Fi on the second floor of the airport can still be used for emergency communication.
통신사 접속 데이터
As the plane stops taxiing at Nikola Tesla Airport (BEG), Terminal 2, the antenna module begins scanning for public land mobile network signals. If your phone shows the PLMN code 220-03, that means it is connected to 엠티에스, Telekom Srbija. In the baggage claim area, this signal typically stays around -90dBm의, which is sufficient for messaging apps.
If the phone connects instead to A1 Srbija, the system identifier changes to 220-05. 안에 New Belgrade, A1 operates B3 (1800MHz) carriers with 20MHz of spectrum bandwidth. In open areas, this setup can deliver peak downlink speeds of up to 140Mbps.
-
MTS bands: · 1 handles baseline coverage, while B20 (800MHz) handles indoor penetration.
-
A1 advantage: In cities, it has more B7 (2600MHz) small cells for dense crowds.
-
Yettel performance: 인증현황 220-01, with more stable handovers on the E75 motorway.
-
Signal level: Ideally, you want to see values between -85dBm의 그리고 -105dBm의.
들어가세요 네트워크 선택 그리고 턴 오토매틱 off. Then manually select mts 또는 A1 SRB from the list. Locking to a specific carrier can save around 15% of battery by reducing repeated network scans at the edge of coverage.
Once the data session is established, the device will receive a private internal IP address in the 10.x.x.x range. Since the traffic is routed through a European gateway, testing tools typically show latency between 80ms and 120ms. That is easily fast enough for instant loading of 구글 지도 tiles.
After leaving baggage claim, ignore the drivers waiting outside offering unofficial rides. Go to the blue Taxi Info counter and ask for a Taxi Voucher based on your destination. The fixed price to the old town (Zone 1)는 2200 RSD.
-
CarGo: Link your Visa card; fares are usually about 20% 저렴 than taxis.
-
Location accuracy: On a 4G 사이트맵 connection, GPS drift is usually kept within 5 미터.
-
Exchange rate: A useful real-time reference is 117.1 RSD = 1 euro.
-
Data verification: Refresh the provider’s app and confirm that your 1GB 또는 5GB package is active.
If you take the A1 airport bus 에게 Slavija Square, the fare is 400 RSD. While the bus is moving, it passes through multiple cell sectors. On Branko’s Bridge, your signal may switch from 사이트맵 to the higher-bandwidth 사이트맵.
If you choose Bus 72, the fare is just 50 RSD. Use your now-connected phone to open Beograd Plus, 가다 Tickets, 선택합니다 90-minute pass, and pay with an international credit card.
-
MTS site density: In central Belgrade, there are roughly 5 physical sites per square kilometer.
-
Penetration loss: In cellar-style taverns (konobas), the signal may weaken by around 파장: 20dB.
-
Uplink limit: When uploading videos to social media, upstream speeds are typically capped around 30Mbps.
-
Offline 지도: It is wise to pre-download around 150MB of Belgrade offline maps.
When walking along Knez Mihailova, many of the old buildings have walls more than 두께: 50cm thick. At that point, the phone may automatically shift toward frequencies around 900MHz의 to improve reception. Even with only two bars, text messaging still feels nearly instantaneous.
제품 정보 Google Lens to scan Cyrillic street signs. A real-time translated image consumes about 400KB of data. The 4G bandwidth provided by your eSIM is enough for instant recognition of place names such as Улица (street) or Трг (square).
-
APN 검사: Make sure the access point is set to
인터넷또는엠비. -
5G lock: If the connection feels unstable, manually lock the phone to LTE/4G.
-
Balance check: 다이얼
*100#or use the provider’s app to confirm your remaining data. -
Public Wi-Fi: Free internet is available on the airport’s second floor as a backup if eSIM activation fails.
When visiting Saint Sava Temple, the enormous dome can create multipath radio reflections. If pages start loading slowly, turn on airplane mode for 10초, then turn it off. This forces the radio module to send a fresh access request to the 엠티에스 network management center.
위에 Soko 기차로 노비사드, built-in signal amplifiers in the carriages strengthen the · 1 band. Even at 200km/h, the eSIM’s multi-cell coordination can keep video calls running without interruption.
-
ATM withdrawals: 찾아보다 Raiffeisen Bank ATMs and avoid higher-fee machines such as Euronet.
-
Bakery purchases: ~을 위해 220 RSD burek, it is still best to have some cash.
-
Data usage: Typical navigation over 24시간 기타 제품 80MB.
-
Cross-border roaming: If you continue to 몬테네그로, check whether your plan includes Western Balkans 로밍.
문제 해결
If, while collecting luggage at Nikola Tesla Airport (BEG), Terminal 2, your signal bar still shows 서비스 없음 or remains stuck on 수색 더 많은 것 180 초, immediately check the physical access settings. In your phone’s 세포 submenu, confirm that the eSIM 라인 is enabled and that 데이터 로밍 has been manually switched on.
Most international eSIM providers route traffic through operator core networks in Belgium or Poland. If roaming is off, the device cannot complete the local base station’s RRC 연결. In that case, the phone may detect the broadcast signal from the tower, but it will not receive a dedicated 10.x.x.x IP address. The result is signal bars showing normally, but no internet connection.
If you have full signal but no data, check the APN(액세스 포인트 이름) settings. In iOS, 가다 셀룰러 데이터 네트워크 and set the LTE data APN to the value provided by the eSIM provider. Common examples include 인터넷, 글로벌데이터, 또는 vfinet.at.
-
Where to enter it: Fill in the APN under both 셀룰러 데이터 그리고 개인용 핫스팟.
-
Username and password: Unless the provider says otherwise, both fields should usually be left blank.
-
Protocol version: On Android, set the APN protocol to IPv4/IPv6.
-
Authorization check: Confirm that the eSIM is authorized for Serbian PLMNs, usually including 220-03 (MTS) 또는 220-05 (A1).
If all of that looks correct, try selecting the network manually. Turn off 자동 네트워크 선택, wait about 60초 for the list to refresh, then try mts, A1 SRB, 또는 요텔 one by one.
| 문제 | Possible Cause | 해야 할 일 | Expected Result |
|---|---|---|---|
| Emergency calls only | Roaming agreement not activated | 데이터 로밍 | 4G/LTE 아이콘이 나타납니다 |
| Full signal but apps won’t open | Incorrect APN | 수동으로 입력 인터넷 또는 엠비 |
Latency drops below 100ms의 |
| Frequent 3G/4G switching | 5G policy conflict | Lock the device to 4G/LTE only | Stable speeds around 20Mbps |
| CarGo verification fails | High ping / latency | Reset network settings and restart | Real-time location sync resumes |
Inside older buildings in Belgrade’s 스타리 그라드, the phone may fall back to B20 (800MHz). Since that band usually offers only around 10MHz의 of bandwidth, capacity is limited, and loading Google Maps tiles may take 5 to 10 seconds. If the delay exceeds 15초, 비행기 형태를 위한 돌기 10초 and then switch it off again.
This forces the phone’s radio module to reinitiate access with the nearest 엠티에스 또는 A1 tower. In high-density places such as the airport terminal, this handshake reset solves most of the false frozen-connection issues caused by base-station congestion.
-
Check your data allowance: Log into the management page and confirm that the 1GB 또는 5GB package has been credited.
-
Activation status: Make sure the plan has entered its 24-hour countdown 기간.
-
Low Data Mode: Check settings and turn it off so background apps are not restricted.
-
Refresh DNS cache: If WhatsApp works but websites do not, try changing DNS to
8.8.8.8.
Before you leave baggage claim and head toward the blue Taxi Info counter, use your stable eSIM connection to confirm the Taxi Voucher fare. The fixed price to Zone 1 이름 * 2200 RSD. If your phone is not working, you may not be able to check the real-time exchange rate (1 euro ≈ 117.1 RSD) and could end up overpaying at an unofficial exchange counter.
만약에 Beograd Plus throws an error when you try to buy a 50 RSD bus ticket, check whether a VPN 시리즈 or accelerator app is enabled. Serbia’s local ticketing system checks IP region, and proxy IPs outside Europe may be blocked outright.
If, on the A1 airport bus 오시는길 Knez Mihailova, the signal keeps dropping between B1 (2100MHz) 그리고 B3 (1800MHz), you can open the phone’s engineering mode to inspect signal levels. An RSRP 더 나은 -100dBm의 is normal. If it falls below -115dBm의, the phone will start searching for a backup carrier.
Base-station density in central Belgrade is extremely high, with a physical site approximately every 400미터 on average. Thanks to the eSIM’s roaming capability, the device can balance between A1의 더 많은 20MHz channels and MTS’s broader coverage.
-
Manual carrier switch: ~ 안에 New Belgrade, A1 is often the better choice for higher download speeds.
-
3G fallback: On some older devices that cannot read 4G properly, 900MHz 3G may still work as an emergency option.
-
Cost firewall: Make sure mobile data is turned off on your main SIM to avoid expensive international roaming charges.
-
Hard reset: If the network failure makes no sense, restarting the phone can reset the low-level network stack.
Once you are connected, it is a good idea to download about 200MB of offline maps for Belgrade right away. That ensures you can still navigate in border regions or signal dead zones, such as the basement of some pekara bakeries. Also make sure Google Lens has permission for real-time translation, so you can instantly understand signs such as Менза 또는 Апотека.
주변 Sava riverfront or high points like Kalemegdan Fortress, multipath interference can affect carrier aggregation on LTE Cat 16 and above. If video calls become blocky, manually locking the phone to LTE can reduce packet loss and keep uplink speeds above 10Mbps 시리즈.